Notes
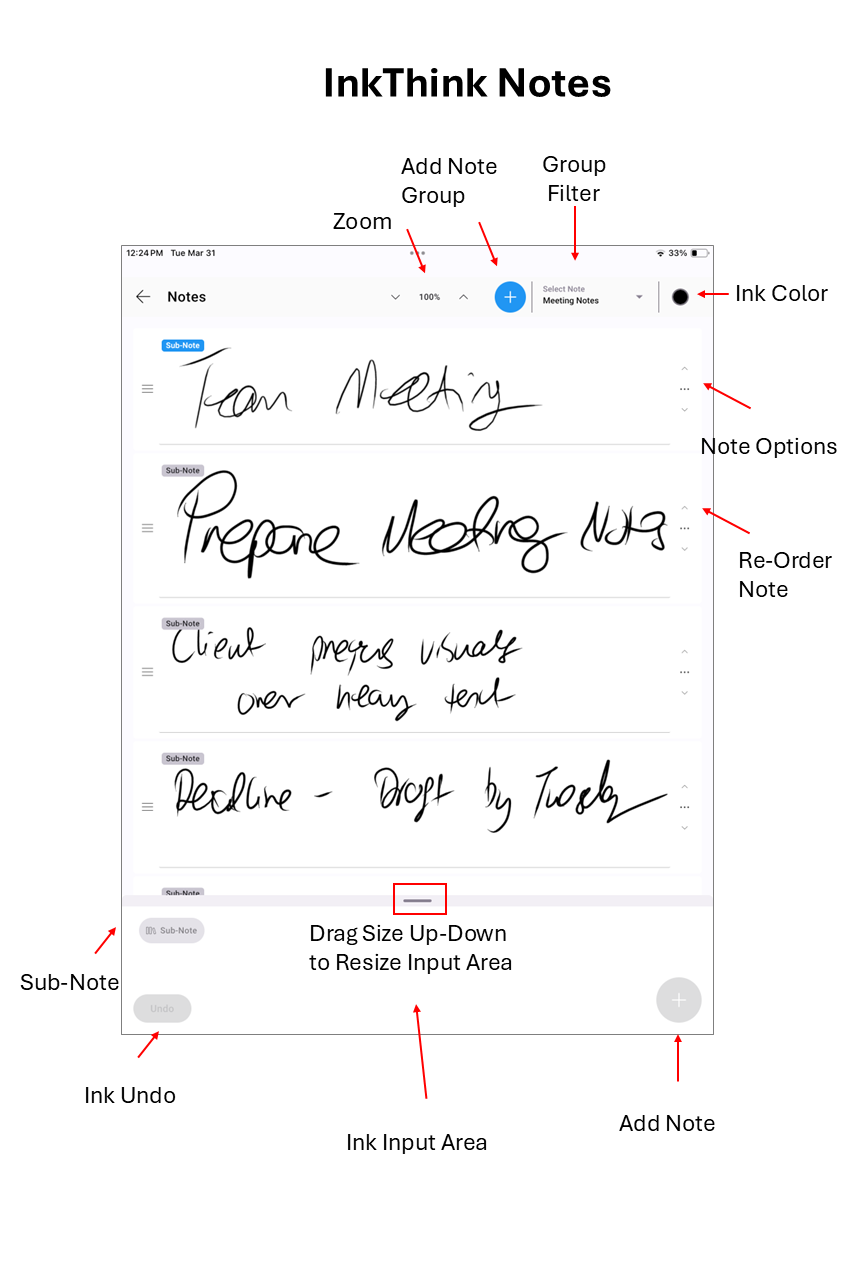
Notes behaves similarly to Tasks. You draw 'mini' notes at the bottom. Think of these notes like 'thoughts' that you are capturing. Your notes are organized into groups - and you can go between your different groups of notes using the dropdown at the top. For example, we think of a note group as like a notebook for a project - it might be a client or a project. Then the 'notes' you add within that notebook (the actual note ink blocks) are your notes within that notebook. This makes it easy to see the quick notes you are taking for a project and you can scroll up and down over time as you collect more notes.
Furthermore, when you pen a note in your note group, you can now actually add 'sub-notes' to a note ink block. This enables you to have a less cluttered and more organized set of ink notes in your notebook. Read our explanation at the bottom.
If it's the first time you are using notes then you can just start inking and then when you click save you will be prompted to give a name for this group of notes. In the future just click the + sign at the top of the app and you can create a new group for your new notes. For example you might want to have a group of notes for 'Meeting Notes' and another one for 'Ideas' etc.
Like on Tasks you can also click for options. Options include
- Edit
- Share (Pro Feature)
- Add to Tasks
- Move to Note
- Delete
Sub-Notes
When you are using the Notes function you simply just ink notes into your specific notebook. However, we have found that often users are taking many notes associated to a 'session' within that notebook. To help organize notes for a particular 'sub' session we've introduced sub-notes. You'll have a parent ink note with sub-notes within it. Let me explain.
For example, let's say I have a notebook group for a project. Each week we have a meeting. Now using the sub-notes function I can start inking my first note as normal. Unlike before, where I would just click the + button and starting inking my next note, I will instead click the 'Sub-Note' button on the left.

InkThink will now save this ink note, and also bring up a new view - showing this 'parent' ink note at the top.

You can now continue to ink more notes, and they will appear in this new list view below the parent ink note. All these new sub-notes are associated to that first parent note. So now I add a 'sub-note' and click +.

and the sub-note is now added, and you'll see it is under the parent-note.

Cool huh! so now you can add many notes for this meeting, and it won't be cluttered when you go back to the main view, when you click Exit.

When I click Exit we are returned to the normal note view.
Now we only see the first ink note for that meeting, so the view is less cluttered. But that view has a blue 'Sub-Notes' icon which when you click will bring up all the sub notes for that note - all the notes you took for that meeting.
This way you can keep one notebook and have a more streamlined collection of notes for each meeting for the project.
I know this sounds complicated as we write it out but in practice its much simpler - basically a set of sub-notes with a note :) And here's a video too.